For generations, the cast iron skillet has been a cornerstone of kitchens worldwide, celebrated for its durability and exceptional cooking performance. But among the many options available today, there’s a special place in the hearts of culinary enthusiasts for the Vintage Cast Iron Skillet. These cherished pieces of culinary history offer a cooking experience that modern cookware often struggles to replicate, bringing with them a legacy of craftsmanship and a unique smoothness that makes every meal a masterpiece. If you’ve ever wondered what makes these old-school pans so special, or how to bring one back to life, you’re in for a treat.
The Enduring Legacy: A Brief History of Cast Iron Skillets
The story of the cast iron skillet is deeply intertwined with human innovation, stretching back thousands of years. Early forms of cast iron cooking vessels appeared in China as far back as the 6th century BCE, eventually making their way to Europe. However, the cast iron skillet we recognize today truly began to take shape in the 17th and 18th centuries in Europe, particularly in the Netherlands and then in Britain. It was during this period that the sand-casting method, which allowed for thinner, more uniform pans, became prevalent.
As settlers made their way to North America, they brought with them the tradition of cast iron cooking. By the late 19th and early 20th centuries, American foundries like Griswold, Wagner Ware, Lodge, and Birmingham Stove & Range (BSR) became household names, producing the vintage cast iron skillets that are now so highly sought after. These companies perfected the art of casting, creating pans renowned for their smooth cooking surfaces, lighter weight, and incredible longevity. The mid-20th century saw changes in manufacturing, with many brands transitioning to automated processes that sometimes resulted in rougher finishes. This shift is precisely why discerning cooks and collectors often seek out these older, vintage cast iron pieces, valuing them not just as tools, but as tangible links to a rich culinary past.
Why Embrace the Vintage Cast Iron Skillet?
It’s a fair question: with so many new skillets on the market, why go searching for a vintage cast iron skillet? The answer lies in several key advantages that these older pans often hold over their modern counterparts, making them a true joy to cook with and a worthwhile investment for any kitchen.
Unparalleled Smoothness for Superior Cooking
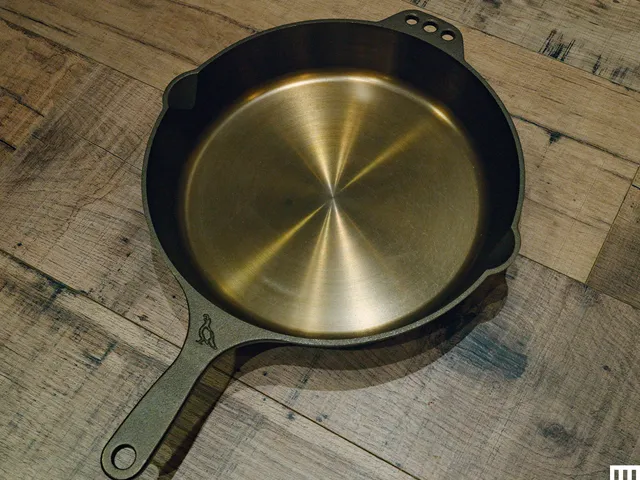
One of the most celebrated characteristics of a vintage cast iron skillet is its incredibly smooth cooking surface. Unlike many modern cast iron pans, which often have a slightly pebbled texture from the sand-casting process, older skillets were frequently machine-milled and polished to a near-glassy finish. This smooth surface provides a naturally more non-stick experience once properly seasoned, allowing food to release effortlessly and making cleanup a breeze. Imagine perfectly seared scallops gliding from the pan, or delicate eggs flipping with minimal effort – that’s the vintage cast iron difference.
Lighter Weight, Easier Handling
Don’t let the “iron” in cast iron fool you; many vintage cast iron skillets are noticeably lighter and thinner than their contemporary relatives. Early manufacturing techniques allowed for more delicate castings that still retained all the fantastic heat retention properties cast iron is known for. This means less strain on your wrists when moving a hot pan from stove to oven, making daily cooking more enjoyable, especially for those who find modern cast iron a bit too cumbersome.
A Natural Non-Stick That Gets Better with Age
The smooth surface of a vintage cast iron skillet provides an excellent foundation for building up a robust, natural non-stick seasoning. With consistent use and proper care, these pans develop a deep, dark patina of polymerized oil that not only prevents sticking but also imparts a subtle, rich flavor to your food. It’s a natural, chemical-free non-stick surface that improves with every meal, standing in stark contrast to synthetic coatings that can degrade over time.
Craftsmanship and Enduring Durability
Vintage cast iron skillets are a testament to a bygone era of meticulous craftsmanship. They were built to last for generations, often outliving their original owners and becoming cherished family heirlooms. The quality of the materials and the attention to detail in their design means that with proper care, your vintage skillet can easily serve you and your family for decades to come.
Historical Charm and Collectible Value
Beyond their practical uses, vintage cast iron skillets possess a distinct historical charm. Each pan tells a story, and owning one connects you to a lineage of cooks who used similar tools. Brands like Griswold and Wagner, in particular, have become highly collectible, with certain rare pieces commanding significant value. It’s not just a pan; it’s a piece of American culinary heritage.
A Sustainable Choice
In an age of conscious consumption, choosing a vintage cast iron skillet is a remarkably sustainable decision. You’re giving a pre-existing item a new lease on life, reducing demand for new manufacturing, and preventing a perfectly good piece of cookware from ending up in a landfill. It’s a simple, yet impactful way to embrace eco-friendly living in your kitchen.
Identifying Your Vintage Cast Iron Skillet
Embarking on the hunt for a vintage cast iron skillet is an exciting adventure. Knowing what to look for can help you distinguish a genuine antique from a newer reproduction, and even identify its maker and approximate age.
The Tell-Tale Gate Mark
One of the most definitive indicators of a truly old cast iron skillet is the presence of a “gate mark.” This is a raised scar or line found on the bottom of the pan, a remnant from where molten iron was poured into the mold. Gate marks typically indicate that a skillet was made before 1890, making it a highly desirable piece for collectors and enthusiasts.
Heat Rings and Their Notches
Many vintage skillets feature a “heat ring” – a raised circumference on the bottom of the pan. These rings were designed to provide a more stable fit on older wood-burning or coal stoves. The presence, design, and even the notches (or lack thereof) in a heat ring can offer clues about a pan’s manufacturer and age. For instance, some early Lodge skillets are known for having three notches in their heat rings.
Handle Shapes and Pour Spouts
Each major foundry had its own distinctive design elements. Pay close attention to the shape of the handle, including any holes, reinforced ridges, or specific contours. Similarly, the design and position of pour spouts can be unique to certain brands. These subtle differences, often overlooked, are key identifiers for seasoned collectors.
Decoding the Markings (or Their Absence)
While many modern pans proudly display their brand, vintage cast iron can be more enigmatic. Some manufacturers, particularly in earlier periods, produced “unmarked” pans for hardware stores or specific retailers. However, even unmarked pans often have characteristic features that point to their origin. Look for:
- Logos and Names: Griswold’s “Large Block Logo” or Wagner Ware’s “Sidney, O” markings are iconic.
- Size and Pattern Numbers: These numbers, found on the bottom or handle, correspond to the pan’s diameter or specific mold.
- Molder’s Marks: Small, raised letters or numbers occasionally found on the pan, indicating the specific foundry worker who cast the piece.
- “Made in USA”: The absence of this stamp generally indicates a pan made before the 1960s.
Key Brands to Seek Out
- Griswold: Renowned for their exceptionally smooth, thin castings and distinctive logos. Highly prized by collectors.
- Wagner Ware: Another top-tier brand, known for quality and smoothness, often featuring “Sidney, O” in their markings.
- Lodge (Older Pieces): While Lodge is a prominent modern manufacturer, their older, vintage pieces are also highly regarded, often identifiable by heat ring notches or early markings.
- Birmingham Stove & Range (BSR): Produced many unmarked pans, often identifiable by a prominent heat ring and specific handle designs.
- Vollrath: Known for their unique handle design with a recessed, reinforced ridge.
Condition Check: What to Avoid
When evaluating a vintage cast iron skillet, always check for:
- Cracks: A cracked pan cannot be safely repaired and should be avoided.
- Warping/Spinning: Place the pan on a flat surface. If it wobbles significantly, it may be warped, which can affect cooking on flat-top stoves. A slight wobble might be acceptable for gas or open flame.
- Severe Pitting: While rust can be removed, deep pitting (small depressions in the metal) might indicate extensive rust damage that could make it difficult to achieve a consistent seasoning.
Detailed Guide: Restoring Your Vintage Cast Iron Skillet
Finding a rusty, neglected vintage cast iron skillet can feel like discovering a hidden gem. Don’t be intimidated by rust or old seasoning; with a little effort, you can bring these pans back to their former glory.
Step 1: Stripping Old Seasoning and Rust
The first step is to get down to the bare metal. This removes old, flaking seasoning and initial rust.
- Lye-Based Oven Cleaner Method: For one or two pans, a lye-based oven cleaner like Easy-Off (yellow cap) is effective. Spray the pan generously, place it in a heavy-duty garbage bag, and seal it. Let it sit for 24-48 hours. The lye will dissolve the old seasoning. Repeat as necessary, scrubbing with a stiff brush and warm, soapy water between applications until the pan is a uniform gunmetal gray. Always wear gloves and eye protection when working with lye.
- Electrolysis (Advanced): For multiple pans or heavily carbonized pieces, an electrolysis tank is a highly effective method. This process uses an electrical current to remove rust and carbon buildup without harsh chemicals. This is a more involved setup but provides excellent results.
Step 2: Removing Stubborn Rust with Vinegar
Once the old seasoning is stripped, you might find underlying rust.
- Vinegar Bath: Create a 50/50 solution of distilled white vinegar and water. Submerge your skillet in the solution. Check the pan periodically – usually within 1-3 hours for light rust, up to 6-8 hours for heavier rust. The vinegar reacts with the rust, making it easier to scrub off.
- Scrub and Rinse: After soaking, remove the pan and scrub it thoroughly with a stiff brush or steel wool. You should see the rust lifting away. Rinse the pan immediately and thoroughly to remove all vinegar residue.
- Caution: Never leave cast iron in a vinegar solution for more than 24 hours, as the acid can start to pit the bare metal.
Step 3: Immediate and Thorough Drying
This is a critical step to prevent flash rust.
- Towel Dry: Immediately after rinsing, thoroughly dry the pan with a clean towel.
- Heat Dry: Place the skillet on a stovetop burner over low to medium heat for 5-10 minutes, or until all moisture has evaporated. You should see the pan change color slightly as it dries completely. Any lingering moisture will cause rust to reappear almost instantly.
Seasoning Your Vintage Cast Iron Skillet: Building a Non-Stick Legacy
Seasoning is the foundation of a great cast iron skillet. It’s the layer of polymerized oil that creates a natural non-stick surface and protects the iron from rust.
What is Seasoning?
Seasoning isn’t a coating that sits on top of the metal; it’s oil that has been heated beyond its smoke point, polymerizing into a hard, non-stick layer that is molecularly bonded to the iron. Multiple thin layers create the best, most durable seasoning.
Choosing the Right Oil
Select a cooking oil with a high smoke point. Good choices include:
- Grapeseed oil
- Flaxseed oil (some debate its long-term durability, but it creates a beautiful initial layer)
- Canola oil
- Vegetable oil
- Lard or shortening (traditional and effective)
Avoid olive oil or butter for initial seasoning, as their low smoke points can lead to a sticky, gummy finish.
Step-by-Step Oven Seasoning Process
- Preheat Oven: Preheat your oven to 450-500°F (232-260°C). Place a sheet of aluminum foil on the bottom rack to catch any oil drips.
- Apply a Thin Oil Layer: Once your pan is thoroughly dry and perhaps still warm from the heat-drying step, apply an extremely thin layer of your chosen seasoning oil to the entire surface of the skillet – inside, outside, and handle. Use a paper towel to rub it in thoroughly, then use a clean, dry paper towel to wipe off as much oil as you can. The goal is to leave an invisible film. Too much oil will result in a sticky, uneven seasoning.
- Bake Upside Down: Place the skillet upside down on the middle rack of your preheated oven. Baking it upside down helps prevent oil from pooling.
- Bake for One Hour: Let the pan bake for one hour at the high temperature.
- Cool Down: Turn off the oven and allow the skillet to cool completely inside the oven. This slow cooling helps solidify the seasoning.
- Repeat: For a truly durable and non-stick surface, repeat this oiling and baking process 3-5 times. The more layers, the better the seasoning.
Cleaning and Maintaining Your Vintage Cast Iron Skillet
Maintaining your vintage cast iron skillet isn’t complicated, but it requires a slightly different approach than typical non-stick pans.
Daily Cleaning After Use
- Cool Down: Allow the skillet to cool slightly after cooking, but don’t let food dry on it.
- Hot Water and Scraper: Rinse the pan with hot water. For stubborn food particles, use a stiff brush, a plastic pan scraper, or even coarse salt as an abrasive. Avoid metal scouring pads or steel wool for daily cleaning, as they can strip seasoning.
- Mild Soap (Yes, It’s Okay!): Contrary to old myths, a small amount of mild dish soap can be used sparingly for cleaning, especially if food residue is greasy. Just be sure to rinse thoroughly. The key is not to soak the pan.
- Immediate Drying: This is crucial. Dry the pan immediately and completely with a towel. For extra protection against rust, place it on a low burner for a few minutes to evaporate any residual moisture.
- Light Oiling: After drying, apply a very thin coat of cooking oil (like vegetable or canola) to the entire cooking surface. Wipe off any excess with a clean paper towel. This protects the seasoning and keeps the pan ready for its next use.
Storage Tips
Store your vintage cast iron skillet in a dry place. If stacking multiple pans, place a paper towel between them to absorb any moisture and prevent scratches.
Delicious Dishes to Craft in Your Vintage Cast Iron Skillet
The versatility of a vintage cast iron skillet knows no bounds. Its ability to retain and distribute heat evenly makes it perfect for a wide array of dishes.
- Perfectly Seared Steaks: Achieve that coveted crust and juicy interior.
- Crispy Fried Chicken: The even heat ensures a golden, crunchy exterior and tender meat.
- Fluffy Cornbread: Baked to perfection with a deliciously crisp crust.
- Eggs Any Style: Once seasoned, eggs will slide right off, whether scrambled, fried, or in an omelet.
- Skillet Pizzas: Creates a wonderfully crispy bottom crust.
- Desserts: From apple crumbles to giant chocolate chip cookies, cast iron bakes beautifully.
- Roast Vegetables: Evenly cooked and beautifully caramelized.
“There’s something truly magical about cooking with a vintage cast iron skillet,” shares Chef Antoine Dubois, a renowned culinary historian and advocate for traditional cooking methods. “The connection to culinary heritage, the exceptional heat performance, and that perfectly seasoned, naturally non-stick surface—it transforms everyday cooking into an art form. Every dish tells a story, and with a vintage skillet, that story spans generations.”
Tips and Tricks for Cooking with Your Vintage Gem
- Preheat Properly: Always preheat your cast iron skillet slowly and thoroughly over medium-low heat for 5-10 minutes. This ensures even heat distribution and prevents sticking.
- Use Enough Fat: While seasoning provides a non-stick surface, a little cooking fat (oil, butter, or animal fat) is still your friend for optimal results, especially with delicate foods.
- Avoid Extreme Temperature Changes: Don’t plunge a hot skillet into cold water, as this can cause thermal shock and potentially crack the pan.
- Limit Acidic Foods (Initially): Highly acidic foods (like tomato sauce or lemon juice) can strip new seasoning. As your seasoning builds up, your pan will become more resistant, but it’s best to avoid them in a newly seasoned skillet.
- Embrace the Patina: Don’t fret over minor imperfections. The dark, glossy patina that develops over time is a sign of a well-loved and well-used pan.
Frequently Asked Questions About Vintage Cast Iron Skillets
Q: Are vintage cast iron skillets truly better than new ones?
A: Many culinary enthusiasts and experts believe vintage cast iron skillets are often superior due to their smoother cooking surfaces (often machine-milled), lighter weight, and older, robust seasoning that develops over years of use. These characteristics contribute to a more naturally non-stick experience and easier handling.
Q: How can I tell if my cast iron skillet is vintage?
A: Look for key identifiers such as a gate mark (a raised line on the bottom, indicating pre-1890s manufacturing), distinct heat rings (raised circles on the bottom, sometimes notched), specific handle shapes, and unique brand markings like Griswold’s “Large Block Logo” or Wagner Ware “Sidney, O.” The absence of a “Made in USA” stamp can also suggest a pre-1960s pan.
Q: Is it safe to cook in a rusty vintage cast iron skillet?
A: No, it is not safe to cook in a rusty skillet without first removing the rust and re-seasoning it. Rust can impart an off-flavor to food and is generally not considered healthy to ingest. Fortunately, rust is usually superficial and can be removed with proper restoration techniques.
Q: What is the best oil for seasoning a vintage cast iron skillet?
A: Oils with high smoke points are ideal for seasoning. Grapeseed oil, canola oil, vegetable oil, flaxseed oil, or even lard/shortening are excellent choices. Apply very thin layers and bake at high temperatures to polymerize the oil into a durable, non-stick surface.
Q: Can I use soap to clean my vintage cast iron skillet?
A: Yes, you can use a small amount of mild dish soap to clean a cast iron skillet. The old myth about soap stripping seasoning is largely outdated, stemming from harsher lye-based soaps. Modern dish soaps are fine for cleaning, as long as you rinse thoroughly and immediately dry and lightly oil the pan afterward to prevent rust.
Q: How often should I re-season my vintage cast iron skillet?
A: The frequency depends on how often you use and clean it. For a well-used skillet, you might only need to do a full oven re-seasoning every few months or once a year. Regular stovetop seasoning (heating with a thin layer of oil after cleaning) after each use helps maintain the seasoning between full re-seasonings.
Unlock the Potential of Your Vintage Cast Iron Skillet
Embracing a vintage cast iron skillet is more than just acquiring a piece of cookware; it’s an investment in a rich culinary tradition, a commitment to quality, and a step towards a more sustainable kitchen. These enduring vessels stand as a testament to craftsmanship and a simpler, yet highly effective, way of cooking. From searing the perfect steak to baking a golden cornbread, your vintage cast iron skillet is ready to become your most trusted companion in the kitchen. So, go ahead, discover the joy of cooking with history, and let Eview Buz be your trusted guide in mastering the art of the vintage cast iron skillet.